RECIPE : Vegetarian Aromatic Crispy 'Duck' Wraps


There are very few foods I miss from my 'old life,' pre weight-loss, because I have always managed to recreate fantastic, low-fat versions of those dishes. Up until a few days ago, there was probably one food that haunted me-especially if I went out for a Chinese meal. I used to love Aromatic crispy duck in pancakes, but once I learned from the WeightWatchers 'Eat Out Guide', that
EACH filled pancake was 9pp/approx.370kcal,
I decided that was definitely a 'NO GO' area!

***


With two vegetarians in my household, I buy quite a few meat-replacement products. There are so many to choose from these days. Supermarket own brand, Linda Mc.Cartney, and Quorn are the ones I use most frequently and I have found that some are really very good alternatives to meat. Quorn, for example, is so low fat and therefore low in propoints/calories, that it gives you the opportunity to make exciting recipes because you can afford to add interesting ingredients to it. These roast style sliced fillets are the inspiration for my Crispy 'Duck' recipe.
Previously, I'd always used them cold in sandwiches and salads....until my son popped them into a stir-fry recently and I tasted it. Once they take on other flavours, such as soy sauce, these sliced fillets become pretty spectacular...and my vegetarian crispy 'duck' recipe was born!

***

This recipe serves 1 as a large portion for 14pp/approx.550kcal, (8 small wraps) or 2 as starter-size portions for 7pp/approx.260kcal each (4 small wraps).

***

YOU WILL NEED:
(1 large or 2 small portions)

1 packet Quorn Roast style Fillets
1 tablespoon cornflour
1 teaspoon chinese 5 spice
1 tablespoon low salt soy sauce

1 clear plastic freezer bag

To Serve:


2 WeightWatchers wraps
(These are 3pp each or two for 6pp so please recalculate if you use a different brand)

4 Spring onions
1/4 cucumber
2 tablespoons hoisin or plum sauce

***


Start by placing the cornflour and chinese 5 spice into a clear plastic freezer bag.


Add the whole packet of Quorn fillets, twist the top of the bag to close, and shake well to coat the fillets evenly with the seasoning mixture.


Once coated, tip the fillets and all the seasoning into a hot pan which has been misted with Frylight oil.


Once the fillets have started to cook, gradually add splashes of the soy sauce. This starts to form a brown, crisp coating and will bring all the flavours together.


Continue to cook on a low-medium heat, turning occasionally until these crisp, tasty areas start to form on the outside. Be careful not to overcook, as the Quorn will go hard-you want the inside to stay soft and silky with a crisp, outer coating.


While the fillets are doing their funky stuff, prepare the other ingredients. Slice the spring onion and cucumber into long matchsticks. (Cut the spring onion into fine slivers). Pop the Hoisin or plum sauce into a small dipping bowl. Have a dish ready for the crispy 'duck'.


When you are ready to serve the dish, zap the wraps in the microwave for 20 seconds, then cut each one into 4. Unless you have easy access to a chinese supermarket and can buy the authentic pancakes, I have found that these wraps make a great alternative.


Enjoy the ritual of spreading each wrap with your favourite sauce, loading generously with cucumber and spring onion, then the mock 'duck'. Roll up and devour and enjoy every morcel!

***

'Duck' in disguise.

***

PRINT RECIPE HERE
Saturday, 27 July 2013 - , , , , , , , 2 comments

RECIPE : Funky Summer Pineapple Rice Salad


I love nature's way of providing natural containers. Some foods just lend themselves to being served in their own skins and this dish is one of them!

***

This yummy rice salad is seasoned with a sushi-style dressing - sweet, tangy vinegar. It's packed full of nutritious red kidney beans, red onion, broccoli, pineapple and pomegranate, then loaded back into pineapple shells for serving.

This recipe makes two extremely generous portions at 7pp/approx.420kcal each or four smaller portions at 4pp/approx.210kcal each.

***

You Will Need:
(For 2 large or 4 small portions)

120g rice/Two 62.5g sachets Uncle Ben's rice


(I always use Uncle Ben's boil-in-the bag rice as it's already in individual portions).

100g tinned red kidney beans
1 red onion
100g broccoli
1 fresh pineapple
1/2 a pomegranate
2 tablespoons seasoned rice wine vinegar


(This is the brand I use, but if you can't get it, simply season some rice vinegar with a little artificial sweetener and pepper to your personal taste).

Black/white pepper
Mixed dried herbs (any)
Dried, chopped garlic
Fresh basil leaves

***

Put the rice on to cook. While it boils for 10 minutes, prepare the pineapple and other vegetables.


Start by cutting off the top stalk and the base end.


If you are making two portions, cut the pineapple in half. If you are making 4 portions, cut each half again to make 4 chunky slices.


Run a really sharp knife around each slice to release the fruit. I find this is an easy way to cut pineapple anyway, with very little waste. It gives a lovely, clean edge.
You will only need half the fruit for this recipe, so pop half in the fridge.


If you are making the salad in advance, put the pineapple shells into a bag and store in the fridge until you need them.


Dice the remaining half of the fruit, discarding the woody central stalk.


Rinse the tinned red kidney beans thoroughly under running water to remove any foamy liquid.


 Chop the broccoli and dice the onion.


For the last 3 minutes of the rice cooking, add the broccoli to the same water. This saves on pans! Once cooked, run plenty of cold water through the broccoli and rice to stop the cooking process. Drain well.


Measure the vinegar into your mixing bowl/s. I always use 2 bowls so that I can allocate the propointed ingredients accurately.


Measure the rice into your desired portions, or if using Uncle Ben's sachets, use one per bowl if you are making 2 portions of salad. Mix the cooked rice into the vinegar and coat thoroughly before adding the other ingredients. This will ensure that the flavour really seeps into the rice.


Weigh the kidney beans accurately into the salad. 50g per portion for two portions,or 25g per portion if making four.


Mix all the other ingredients into the salad and season to your personal taste. Include any pineapple juice that may have been released from the fruit.
Add some fresh or dried chilli or piri-piri seasoning if you like a salsa kick, or pepper for a pungent flavour. I love dried chopped garlic but add some fresh, crushed garlic if you prefer.
If you like, add a squeeze of lemon or lime juice.


All that remains is to place a pineapple shell on each serving plate...


...and load up until they are cram-packed with the salad. Top with a sprig of fresh basil.


Enjoy the Summer flavours in this nutritious, filling salad. Soft, chewy rice and beans, crisp onion and broccoli and sweet, juicy pineapple and pomegranate.
This is fabulous served alfresco - especially to accompany a barbecue.

***

Wednesday, 24 July 2013 - , , , , , , 0 comments

SMASH & GRAB : Toasted Wrap & Houmous with Summer Salad


During this unusually hot spell the UK has been experiencing, I haven't felt like cooking or eating huge meals. I'm tending to graze more when I'm hungry and the foods which are appealing to me are both light and refreshing.
This is a super-easy nutritious lunch, snack or starter. At face-value, it's houmous with a wrap...but with a little Slice-of-Slim magic you can turn it into a really spectacular little feast!

This works out to 6pp/approx.240kcal per portion.

***


Take a low fat wrap. I've been using the WeightWatchers ones recently. For their size, they are very good value propoints-wise, at 3pp each. You can have two for 6pp and three for 8pp too, which is great news!
Fold the wrap in half, then half again and toast gently in the toaster. This way, you get two crispy-edged pieces, and two more 'bready' ones when you tear it into quarters to serve.


While the wrap is toasting, prepare a 60g serving of low-fat houmous. I love these Sainsbury's mini snack pots.
Be careful, though, as the nutritional information on the packaging is for a 30g serving which is HALF an individual pot, which is 1pp/50kcal. If you use the whole pot like I do, it's 3pp/100kcal.


Dice some tomato and cucumber and pop on the plate with some torn basil. No dressing required-trust me!
Scoop the houmous out of the pot and sprinkle with your favourite seasoning. Just taking 30 seconds to do this transforms it from a regular snack into a deli treat! 


I'm loving this garlic pepper at the moment, so that's what I used...it transforms salads and snacks with a pungent, garlicky kick.
You could use some dried or fresh herbs or sweet chilli sauce - whatever you fancy. 


To eat, simply tear the wrap into 4 pieces. Spread each quarter with houmous and load up with salad...it's almost like a fresh, creamy Summer pizza...delicious!

***

Houmoustastic.

Monday, 22 July 2013 - , , , 0 comments

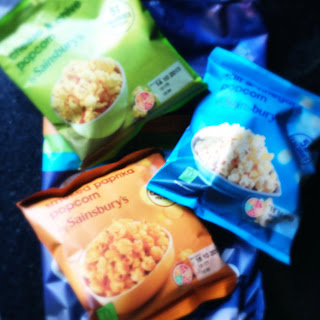
CUPBOARD LOVE : Sainsbury's Savoury Popcorn


I've just discovered this savoury popcorn in Sainsbury's.
It's great value on the propoints front!
Each individual bag is 1pp/53kcal, or 3pp for two bags.


The large, outer bag contains 6 packets of popcorn; 2 paprika, 2 cheese & chive and 2 salt & vinegar. The bags are quite small but make a great alternative to a packet of crisps with a sandwich or wrap for lunch. The flavours are tasty albeit a little on the salty front, but all in all a good little find.

***

Poptastic!
Friday, 19 July 2013 - , , , , , 0 comments

SMASH & GRAB : Parma Ham & Melon


If you have ever been to Italy for a holiday, you will know that Parma ham and melon is a well-loved starter. 
This is the simplest of dishes using 2 ingredients that marry so perfectly. Sweet, juicy melon and very thin, salty ham - incredible!
It's a wonderful starter or light lunch, particularly in hot weather.


I use half a melon
(Cantaloupe or Honeydew work best)
and 47g Parma ham (roughly 3 slices)
per person.
This is 3pp/approx.300kcal per portion


Simply halve and deseed the melon. Peel and cut into slices.
Arrange on your serving plate.


Trim any excess fat off the ham using kitchen scissors.


Gently drape the thin ham over the melon.
Garnish with a few basil leaves and a grind of black pepper.

***

Light, refreshing, simple.
Thursday, 18 July 2013 - , , , , , , 0 comments

RECIPE : Crispy Quorn Salad


Here's a gorgeous, simple idea - perfect for those days where you are short of time or the inclination to come up with anything creative. This takes 12 -15 minutes to make and is very good value too.


 There are two vegetarians in my family, so we often use vegetarian products, such as Quorn. It's a great source of protein and fibre. These crispy coated fillets are great standbys for a quick lunch or supper with a jacket potato or salad. Because the Quorn fillet itself is so low-fat, you can easily afford the cheesy filling and breadcrumb coating within your propoint budget.

These work out to 7pp per fillet for either variety.
(The Gruyere cheese-filled fillets are 267 kcal each and the lemon/pepper variety are 256 kcal each).

***


As I was making this for two people, I cooked one of each variety of fillet. We couldn't choose which flavour to have, so we had half each of both varieties!

***

They only take 12 minutes to bake.
While they are cooking, simply throw together your favourite mix of salad leaves.
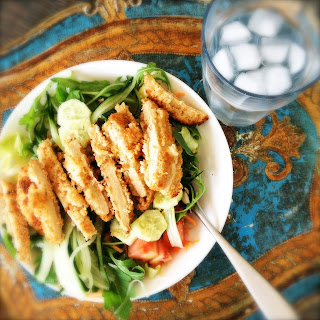
I used a mixed, crispy selection from the supermarket. I added rocket leaves, diced tomato and cucumber strips and slices. I dressed it simply with Chinese seasoned rice wine vinegar and a little white pepper.

***


To serve, cut the fillets into thin, goujon-style strips and lay generously over the salad.
The warm, crunchy goujons combine with the refreshing, crisp salad to form a filling and delicious meal.
I could live on this!
Sunday, 7 July 2013 - 2 comments

FOOD FOR THOUGHT : Time to Declutter


I've never been a very tidy person. Sometimes, depending on the task, I can be pretty organised but I'm not a great one for systems.

***

Starting WeightWatchers, losing and maintaining my 62lb weight loss has been an incredible journey and has taught me so much about myself. I now know that I have determination, that I can stick to things and that that I have willpower and discipline. Slice-of-Slim confirms this, as I am as committed to writing, innovating and posting regularly onto the blog as I was when I started 18 months ago.

***

Losing my weight has not been solely about that fat coming off, it has also been about learning to respect myself, give myself time and nurture and 'stop and smell the roses' - i.e. appreciate my surroundings, my home, my family and the things that are happening in my life right now.

***


Do you remember the craze for these 'Magic Eye' pictures a few years ago? If you stared into them from a certain distance for a while, all of a sudden, something in our eyes and brains 'clicked' and a 3-D image would appear like a miracle!
Well, I think setting onto that journey, making the decision to lose weight and take responsibility for our eating habits is a little like that. One day-whether it's an experience, a photo or a feeling, something 'clicks' in us and that is when we know we are ready. The mindset is much more powerful than the stomach! Once you decide "I want it" enough, you can make it happen.


So...the reason for this photo of clutter and my freshly-delivered skip at the top of the page, is because something has 'clicked' in my head and all of a sudden, I am seeing 15 years of accumulated clutter in my house.
Mr.S-O-S has taken next week off, the dog is going into kennels and we are having a SERIOUS life laundry! Can't wait!

***

For this reason, I won't be posting on the blog this week, so please take the time to have a look through the archives- check out my different categories-by propoint or meal-type...I'm sure there are recipes and ideas you will have missed.
I'll be staying in touch via my Facebook page (well, we still have to eat!), so there'll be lots of chatting and ideas going on there. Here's a link if you don't already follow Slice-of-Slim on Facebook. 
(Click HERE)
If you 'like' the Facebook page, you will get regular updates and links to my posts etc-it's just another way to stay in touch
with Slice-of-Slim.

***

Hope you all have a great week and see you soon...decluttered and raring to go!
Love, Janey
x x x

Friday, 5 July 2013 - , , , , 0 comments

SLICECREAM PARLOUR : #10 Mochaccino Dessert Cups


Every week throughout the Summer, I will be revealing a new and exciting flavour of delicious low-fat 'ice cream' in my
Slicecream Parlour
This week, I've decided to bring together a combination of crushed Amaretti biscuits smothered in a rich chocolate 'ice cream', then a layer of coffee granita made from frozen espresso. Finally, it's topped with sweet, frothy cream to make a mochaccino-style dessert cup. I'm serving it in large coffee cups to really get the coffee-shop theme going.

***

This is a rich, sophisticated dessert and works out to 3pp/approx.200kcal per portion.

 There's just a little pre-preparation required as the coffee will need to be frozen prior to assembling the dessert.

***

You Will Need: (For 2 portions) 

1 shot of coffee 
Water to dilute 
Artificial sweetener to taste


6 Amaretti biscuits
(I used this brand which work out to 2pp/approx.80kcal for 3 biscuits)

1 batch of banana 'icecream' base using 2 medium bananas

(Click HERE for recipe)


22g WeightWatchers Select Luxury Hot Chocolate
(I have found this brand makes a really rich, superior chocolate 'icecream' but any reduced fat variety will work).

50g WeightWatchers thick cream
1-2 tablespoons skimmed/soya milk
Artificial sweetener to taste

***

Pre-Preparation


Start by making a strong shot of espresso. This dish is best made with fresh coffee, but if you don't have a coffee maker, you can use instant coffee made to the strength you like. Sweeten (or not) to your personal taste, then dilute with enough water to fill an ice-cube tray. Pour into the ice-cube tray and freeze until solid.


***


When you are ready to serve


Start by roughly crushing the Amaretti biscuits and pop them into the bases of 2 large coffee cups.


Blitz the frozen espresso ice cubes in a food processor until they resemble demerara sugar.


This is the espresso coffee granita.
Pop it into a separate dish back into the freezer while you make the chocolate 'icecream'.


Don't worry about rinsing out the food processor bowl before making the chocolate 'icecream', as a few granules of frozen coffee will only enhance the mocha taste in the finished dish.
Pile the sliced frozen banana into the food processor with the chocolate powder and make according to my instructions in the link above. Blend until smooth and 'mousse-like'.


Distribute the chocolate 'ice cream' equally between the two coffee cups.


Top with the coffee granita.


Working quickly, measure the cream into a container and 'thin down' with a little milk. Sweeten if required.


Whisk to form bubbles...or a tip from the Slice-of-Slim kitchen...pop the mixture into a lidded container and shake vigorously (like making a cocktail!) until you have a frothy liquid.


Pour the frothy cream over the desserts to finish.

***

Amazingly Mochaccinoliscious!

***