SOMETHING FOR NOTHING : Roasted Red Onion & Basil Mushrooms


I had the idea for these amazing mushrooms the other day while looking for a tasty accompaniment to have with my Aubergine Kievs.
(Click HERE for recipe).
I happened to have some large portabello mushrooms and a couple of red onions that needed using up, and I always have a large basil plant on my kitchen windowsill...
1-2-3 and these babies were invented!
You only have to look at the vibrant colours in this dish to know it's going to be good for you....and the flavours-nothing clever, very simple but totally and utterly delicious! Somehow, these 3 ingredients combine to bring out the best in each other.
I'll be serving these with grilled meats, fish and vegetarian dishes all year round.
They take 1 minute to make
and 25 minutes to bake.

They are 0pp/approx.50kcal each

***

You Will Need : (Per serving)

1 large open mushroom.
(Portabello have a fantastic flavour)

1 small red onion
Generous handful of fresh basil leaves
Dried mixed Italian herbs
1/2 teaspoon of low salt soy sauce
Black pepper
Frylight oil

(You could use 1 teaspoon olive oil for 1pp/40kcal)

***

Preheat the oven to 200 degrees centigrade.


Quarter the onion and pop with plenty of fresh basil into a food processor with some dried herbs. Blitz until roughly chopped and chunky.


Heap the onion mixture generously into the mushroom in a thick layer. Mist lightly with Frylight or olive oil. Sprinkle a few drops of soy sauce on the top.


Roast for 25 minutes until the top is crisp and golden.
Season with freshly ground black pepper and garnish with a single fresh basil leaf.


Serve with your chosen main dish.

***

Purple power!

***

TIPS

Serve as a starter with a simple salad.

*

Experiment with ingredients such as garlic, pine kernels, sage, ground nuts.
(Add propoints/calories where needed)

***


SOMETHING FOR NOTHING : Frozen Banana 'Icecream' Base


This idea has been around for years but for those of you who don't know about it, it is a miraculous feat of nature and technology!
Unlike many homemade ice-cream recipes, you don't need an icecream maker for this one, but you will need a food processor.
(A basic one will do, but not a hand-held one used for soups and purées).

***

Frozen banana, when blended in a food processor, becomes the most incredible, sweet, soft-scoop textured 'icecream'. It takes a little patience, but once you have mastered the basic blending technique which I will show you here, we are going to have some fun! 

***

I've called this recipe a 'base' because, even though fruit is 0pp on the propoints plan, we all know that bananas are full of natural sugars, so I would not advocate eating more than one a day on an every day basis. One frozen banana only makes a small portion of 'icecream', but when you combine it with other ingredients, you will end up with a generous bowlful of sweet, creamy delight, sending your tastebuds on a dream holiday! Your brain will be so blown away that it is eating such low propoint treats, it will need a lie-down!


***

The Basic Recipe

Frozen Bananas
(Allow 1 per person)

(I find that 'just-ripe' bananas work best for this recipe rather than over ripe ones)


I freeze bananas in their natural state. Some people peel, slice them up and put them on trays to freeze but there really is no need. You can just keep a few bananas in the freezer, shoved into the spaces you can find, ready for whenever you want to make this.


Remove the bananas from the freezer and allow to stand for about 5-10 minutes. Using a bread knife, slice the banana into large chunks.


Slice off the peel. It comes off really easily.


You will end up with chunks of banana like this.


Cut each chunk into 3 or 4 slices.


Pop into the food processor. I have a small, pretty basic machine, so mine holds up to 3 or 4 bananas at a time.


Prepare your ears for noise, then blend on high until the mixture stops circulating.


At this stage, it will resemble 'crumble topping', with uneven pieces of banana. Dislodge the pieces from around the blade and the sides with a spatula or an every day knife you would use to spread butter (or low fat margarine!) etc. Blend again until it stops moving.


This time it will be tiny pieces of granular banana. I call this the 'cous-cous' stage. Dislodge and blend again. This is where the process takes patience. You will need to dislodge and blend around 8-10 times and you will feel like it's never going to happen!


Towards the final stages, the mixture will form a ball. Again, break up the ball and blend. You can see where the 'icecream' is starting to form around the edges. It resembles cookie dough.


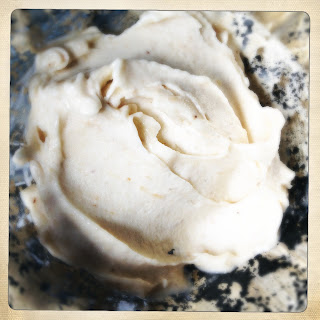
All of a sudden, after about 10 minutes of blending, dislodging and blending again, the frozen banana realises you mean business and it forms this incredible, smooth textured bowl of joy.
I prefer to make these mixtures fresh - as I'm about to use them, as the texture is at its ultimate in softness and silkiness straight from the food processor. (Once you start refreezing, ice crystals will form and you will need to stir after 2 hours, then leave out of the freezer for an hour or two before using). Somehow, it's never as good if you refreeze it. 

***


Alternatively, if you are happy to make the investment, a Yonanas frozen dessert machine makes the process really easy.
Click HERE for the link to my review of the Yonanas.

***

A Basic Zero pp Recipe
to get you going 


I talked about these frozen fresh fruits a couple of weeks ago.
(Click HERE for the link)
They are worth keeping in the freezer over the summer for last minute recipes like this. There are about 6 different varieties. I also keep grapes (pulled off their stalk and popped in a bag) in my freezer, and pineapple chunks.


Use any combination of these frozen fruits to make your desired 0pp 'icecream'. Always blend them with the frozen banana at the start of the process so that you end up with a silky smooth result.


Make in exactly the same way I have described above. Remember that if you use grapes and fruits with a high water content, you will end up with more of a sorbet texture, rather than a creamy one. There are so many permutations, so have a play and master the basic technique- they are all delicious!


As the weeks go on, I will be introducing more and more fun and exciting ideas...so I'll be opening a virtual

Slice-of-Slim
'SLICECREAM PARLOUR'!

It will even have its own category
on the blog index.

***

Fruity Fun in the Summer Sun

***

TIP

As with anything banana based, wash out or rinse the food processor/blade and bowls immediately after using as once oxidised and blackened, it is as sticky as glue and difficult to clean up.

***

PRINT RECIPE HERE
Thursday, 25 April 2013 - , , , , , , , , , 4 comments

RECIPE : Scotch Eggs


I love a challenge.
So, when a Slice-of-Slim follower wrote to me begging for a slimmed-down version of her favourite lunchtime snack, how could I resist? She said that the Scotch egg she liked was 18 propoints (approx.720kcal). I was stunned to find that they do seem to range from around 12-20pp (approx.400-800kcal) each, depending on ingredients and cooking methods used.

***

Initially, I thought about doing a clever twist - a sliceable loaf, or a miniature version. But the true joy of a real Scotch egg is its enormity - that great klonk of a breadcrumb-coated sausage-wrapped egg, impossible to get your choppers around!
Having said that, I did end up making two sizes- a traditional, whole egg and a half-egg version which still turned out pleasingly chunky.
I've done a vegetarian option too, so nobody misses out!

***

My Scotch Eggs work out to;

6pp/approx.240kcal for the large size
 and
3pp/120kcal for the small size
(still chunky!)

***

You Will Need: 
(Makes 4 large or 8 small scotch eggs)

4 hard-boiled eggs

8 sausages
I used WeightWatchers premium pork sausages
(1pp/60kcal each, two for 3pp)
or
Quorn vegetarian sausages
(2pp/70kcal each or two for 4pp)

Please alter pp/calories if you use a different brand to mine.
(N.B even though the propoints vary, the overall values work out the same for the finished eggs using these brands, when put through the WeightWatchers Recipe Builder).

1 egg white
white pepper

10g flour
(the recipe uses this amount but put more in the bowl for ease of coating)

2 slices
WeightWatchers Danish White Sliced bread
(1pp/50kcal per slice, two for 3pp)
If you use an alternative, adjust pp/kcal accordingly

Frylight Oil

***

How to Assemble


Scotch Eggs are really simple to make, but the key is organisation. You need to prepare a work station containing 5 bowls and a baking tray lined with baking parchment.
(My photo shows 6 bowls because I made a vegetarian version too).


Bowl 1
Plain flour.
Put more in than recipe states, to make it easier to roll the Scotch eggs into. You will have a small amount of waste.

Bowl 2
Egg white.
Beat and season with white pepper.

Bowl 3
Breadcrumbs.
Blitz the sliced bread in a food processor until you have fine breadcrumbs. I leave the crusts on.

Bowl 4
Hard-boiled eggs.
Put raw eggs in cold water, bring to the boil. Boil for 8 minutes then run under plenty of cold water. Peel under running water.

Bowl 5 
Sausage Meat.

Meat Sausages
Slit the sausage skins and release the sausage meat. Blend together with a fork.

Divide into 4 or 8 equal portions depending on your desired size.
(N.B. the large Scotch eggs use 2 sausages each, the small ones, 1 sausage)

Veggie Sausages
No need to remove the skins, just blend in a food processor until they resemble sausage meat.

Divide into 4 or 8 equal portions depending on your desired size.
(N.B. the large Scotch eggs use 2 sausages each, the small ones, 1 sausage)

***

Preheat the oven to 200 degrees centigrade


Start by taking 1/4 (Equivalent to 2 sausages) of the sausage meat and forming a flat patty, quite a bit larger than the egg. Some people pop it onto clingfilm to help pull around and form the Scotch egg, but I didn't find it a problem to use my hands.


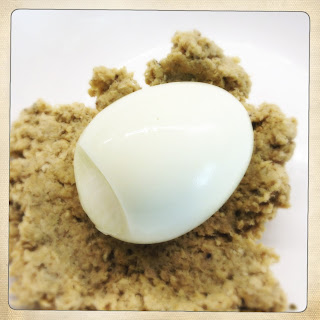
Gently but confidently, shape the sausage meat around the egg until it is totally enclosed with no gaps.


Sculpt until you have a perfect sphere.
You will find you need to wash your hands a few times during the dipping process as the sausage meat can be a little sticky.


Pop into the flour and roll gently until the whole egg has a light coating. It's much easier to handle at this stage, so reshape any parts you are unhappy with.


Dunk and coat quickly into the seasoned egg white, then straight into the breadcrumbs.


Coat evenly in breadcrumbs.


Place gently onto the baking tray, lined with baking parchment. Repeat with the remaining ingredients.


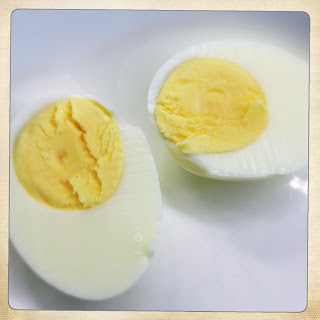
If you are making the smaller version, slice the egg in half down the long side so that you get 2 even halves with a good distribution of yolk and white.


Form in exactly the same way, encasing the halved egg totally in sausage meat. Remember to use 1/8 of the sausage mixture (Equivalent to 1 sausage) for each of the small ones.


Repeat until you have made them all.
You could do what I did and make a variety of large and small sizes.
(Great for Daddy bear, Mummy bear and Baby bear!)
Mist lightly with Frylight oil then bake in the oven for 30 minutes. Turn once, respraying the exposed sides with a little more Frylight.


This ensures a crisp and golden finish.


Allow to cool to room temperature before serving (if you can resist!)
They are lovely and filling for breakfast, lunch or a nutritious snack.
I served mine in a straw-lined egg box for a casual family lunch. I thought this was such a fun idea!


 You can serve simply, cut in half with a fresh, green salad and some ketchup/bbq sauce. I love them with Extra light mayo and loads of black pepper.
(Remember to add pp's/kcal for relishes).
Crisp outside, soft herby sausage and protein-rich egg inside...a wholesome meal in one tasty snack.


The smaller size still look attractive when cut open.

***

TIP


If you make a batch, these keep well in the fridge for a few days.
Once cooled, Scotch Eggs are pretty robust and travel well-great for packed lunches or picnics. Wrap in a piece of greaseproof paper, twisted at the ends like a huge sweet for easy transportation. You could even tie the ends with string or straw if it's a 'posh picnic'.

*


Use the egg box idea, but alternate Scotch Eggs with salad leaves and cherry tomatoes. You won't be able to shut the lid, but wrap in foil or tie in a bag to keep fresh for a picnic.

***

And Finally...


In true Slice-of-Slim style, how could I resist Scotch Egg Pops? These work best with the smaller size but I thought would be a really funky element to a picnic or lunchbox for small kids or big kids like us!

***

Slice-of-Slimmified Scotch Eggs.

***

SMASH & GRAB : Salsa Dip


It's all very well munching on raw veggies for your zero propoint snacks to fill you up, but sometimes you might just fancy something a little tasty to go with them. My homemade salsa is easy-peasy, takes 30 seconds and at 0pp won't take you into any dipping danger zones!

***


You Will Need : (Makes enough for 2 large ramekins or 4 smaller portions)

It is 0pp/approx.125kcal for the whole amount

1 small onion
1 clove garlic
20 cherry tomatoes
2 tablespoons passata
Juice of 1 lime
Black pepper
1/2 teaspoon artificial granular sweetener
A few fresh coriander leaves

 Optional kick
A few drops of tabasco or chilli sauce

***


Chop the onion and garlic roughly, then pop all the ingredients together in a food processor and pulse-blend until you get your required consistency. Finely diced salsas are attractive, but I find that a smooth blend is much easier for dipping. 
Taste, then adjust the flavour to your liking - a little more pepper, a splash of chilli.

***


Initially, the salsa will appear runny, but if you pop it into a bowl in the fridge, it seems to thicken up naturally after a few minutes.
This recipe makes enough for two generous ramekins. Garnish with fresh coriander.
Keep covered in the fridge.
Will stay fresh 2-3 days.

***

 Serving Suggestions


Serve like I did with fresh cucumber and carrot sticks. I recycled a corner yoghurt pot, which worked perfectly! You could also serve with a packet of WeightWatchers Nacho Cheese Tortillas which are 2pp/83kcal per pack.


Salsa makes a delicious relish topping for a toasted wrap or burger, adding a zesty garlic punch for no extra propoints.

***

Do the salsa!

***

Monday, 22 April 2013 - , , , , , , , 0 comments

CUPBOARD LOVE : WeightWatchers Breakfast Biscuits


I've been given a bit of a heads up on a new product arriving in the shops very soon. As we all know, it's so important to start the day with some breakfast- to get our metabolism going and start burning fat off!
Many of us are time-short in the morning, so it's very easy to neglect that breakfast moment our bodies crave. Even if you're not one for a big brekkie, these WeightWatchers Breakfast Biscuits are great because you can pop them in your bag to eat on your journey to work, or even have them for Elevenses.

***

As you know, I will only review products I would use myself and these really appeal to me. I buy the normal WeightWatchers cookies all the time, because I love the fact that they come in individual portions of 2. They satisfy my sweet tooth while helping me to control my urges to repeatedly dip into an open packet of biscuits.


Even though these breakfast biscuits are double the propoints of the standard WeightWatchers cookies, I've taken this photo to show you a comparison. They are a really generous size. I found them quite filling, especially with a cup of tea. The texture is very much like a digestive biscuit.

They are 4pp/158kcal for 2 biscuits

***


 Breakfast Biscuits are made with wheat and oats with added Vitamin B and iron. They have no artificial colour, flavour or preservatives. They come in 2 varieties; Fruit and Seeds...


...and Milk and Honey which were my favourite. When I was younger, I spent 2 summers working as an au-pair in Italy. They often serve simple honey biscuits with coffee for breakfast in Italy and the flavour of these took me back there. I loved them.


Of course, if you do have a couple of minutes spare, you could always spread them with 35g Lightest Philadelphia for an extra 1pp/35kcal. I added some sliced banana and it made a quick, delicious and filling breakfast.
They would be fab with a low fat yoghurt too.


For a decadent treat, they're lovely dunked into 30g warm chocolate philly for an extra 2pp/86kcal. (What isn't?)

***

You get 6 portions of two biscuits in each pack. The RRP is £2.49, so 42p for breakfast isn't bad going! Look out for them in Sainsburys and other independent stores.

***

Now you have an excuse to eat biscuits for breakfast!